13.4 Machines
Machines are the items that allow you to make things. They come in many forms but essentially they all take in one or more products as ingredients to produce one or more products as their output. Machines can either run on their own or require you to ‘sit’ at them to make the item.
An easy way to make a new machine is to start with one of the existing ones – we will use the SatyrFarm Kitchen. If you rez one out and then start editing it, you will see that it contains an ‘invisible prim’. Machines show things like progress, the list of required ingredients etc. as float text over the root prim, so often an invisible prim is used to ensure that text appears in an easy to see place.
To make our new machine we can simply unlink the root prim from the SatyrFarm Kitchen and use that as our starting point (you may want to set the texture to blank/default before unlinking so you can see it!)
Once we have done that we can delete the rest of the SatyrFarm kitchen.
Machines contain the following items:
Config notecard – this is the configuration for the machine
Recipe notecards – there is a master notecard plus one for user added recipes. The recipes tell the machine how to make things.
Product – the product that the machine makes must be available in the machines contents (although the machine will call out via ‘share mode’ to storage units in the region to try and find a missing product – see storage in section 13.2)
Textures (optional) – there can be one or more prims that show a texture when the machine is operating.
Scripts – more information on the scripts can be found in chapter Chapter 14
Let’s make a new machine using the prim we have just separated.
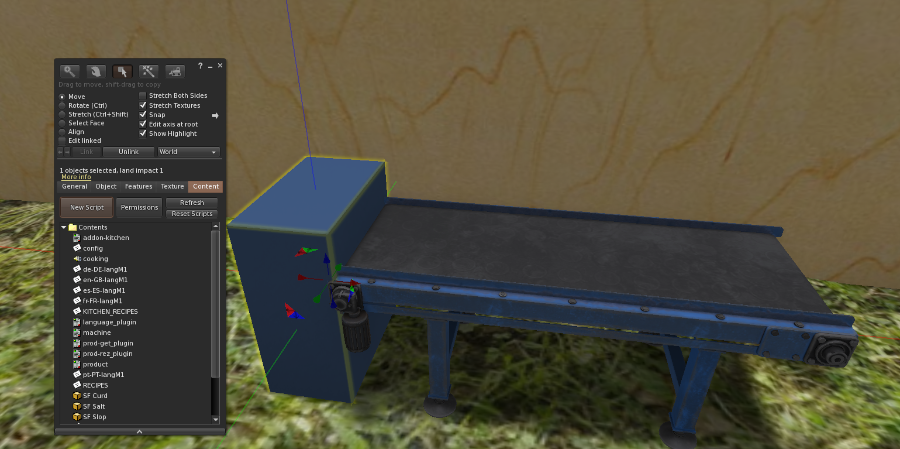
Here we have resized the prim, changed the colour and put it next to the object we are using for our new machine. All we need to do is select the new object then shift click on the ‘machine prim and link them:
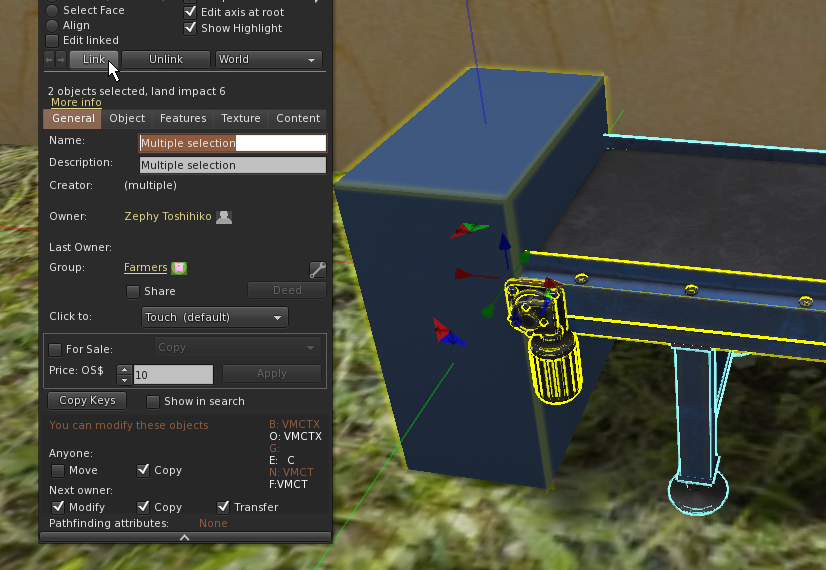
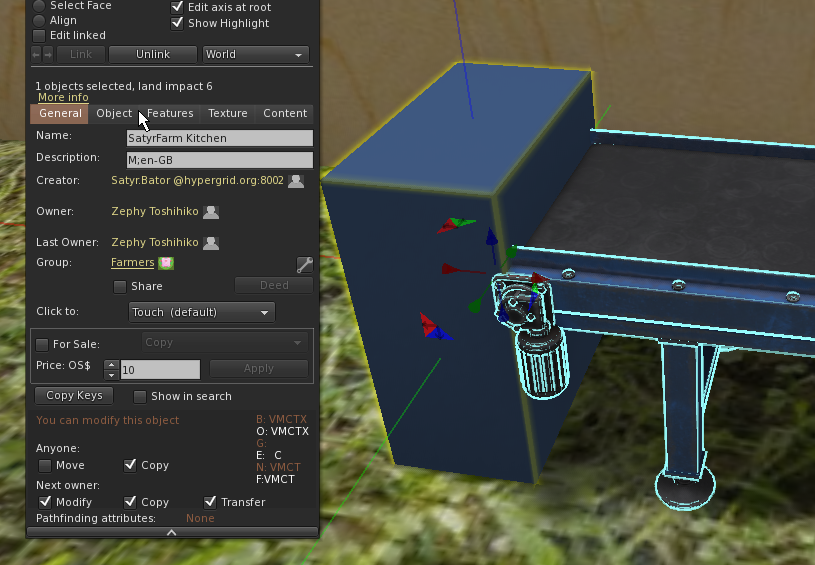
After we link we should see the new object has the prim we took off the other machine now set as the root prim for our new machine - it still has the name from that previous machine, so we can change that.
N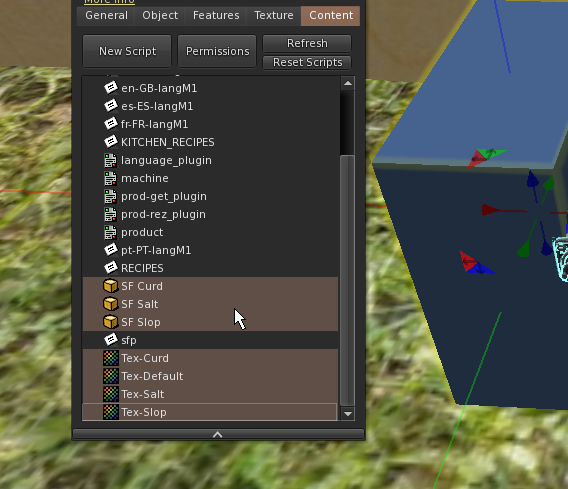 ow take a look in the contents where you will see various products and as we don’t want our new machine to make any of these we can delete them and also their associated textures and add in one or more products that we want the machine to be able to make. We also need to modify the recipe card for our new product(s).
Before we do that though we should edit the confignotecard to check/adjust three key settings. First we can choose if the machine requires you to sit at it in order for it to operate. For our machine we don’t require that so we set the MUST_SIT option to 0:
# Set to 1 if avatar must sit and stay to produce item
MUST_SIT=0
Next we can choose if people will ‘make’ or ‘do’ – you might make a widget or do some washing for example:
# Set to 1 to use 'make' or 0 to use 'do'
MAKE_VERB=1
Lastly we need to set up the R Code used for the main recipe notecard. This is a feature that allows the machine to integrate with the Quintonia server to share and allow for updating recipes. Since we are calling this machine the ‘SF Widget Maker’ we could pick WIDGET for our machine:
# (Optional) Recipe code when using networked recipe cards
RCODE=WIDGET
Now we can rename the recipe notecard so that it is the R Code followed by ‘_RECIPES’ i.e. WIDGET_RECIPES
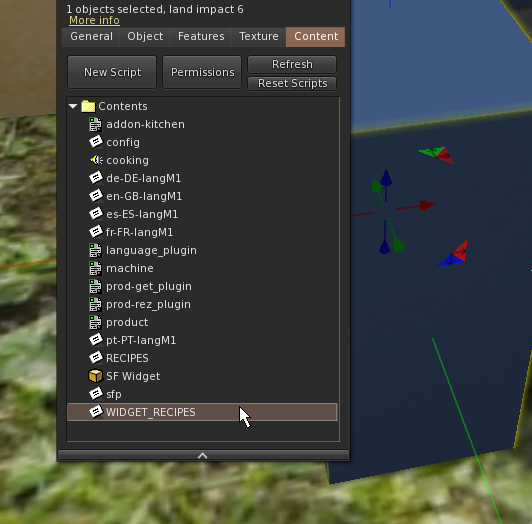
We can now edit the notecard to set up one or more recipes.
(a) Recipes
To create a recipe, you just need to add a line in the RECIPES notecard inside any food-processing object like the Kitchen, Juicer, microbrewery etc. The notecard first starts with the version in the format @VER=n where n is an integer:
@VER=1
Then you put the text that will be shown on the menu (in the selection screen) inside square brackets. For this recipe you want to display it as ‘Widget’ so put [Widget]:
[Widget]
Then you specify how long (in seconds) it takes to make the item:
DURATION=120
Next you list the ingredients required to make the item. In the ingredients list you have the option to indicate percentages and also give a choice of items. So if you only need to use half a bucket of ‘SF Aluminium’ and could use either SF Wood or SF kWh it would be written as:
INGREDIENTS=50% Aluminium, Wood or kWh
Note that you should not include the ‘SF’ part in the ingredients list. When using a percentage and a choice you need to put the percentage for both items (and they can be different) e.g. ‘50% Wood or 50% kWh’
Now you specify what product is made. This does need to be the full name including the SF part if it is part of the product name.
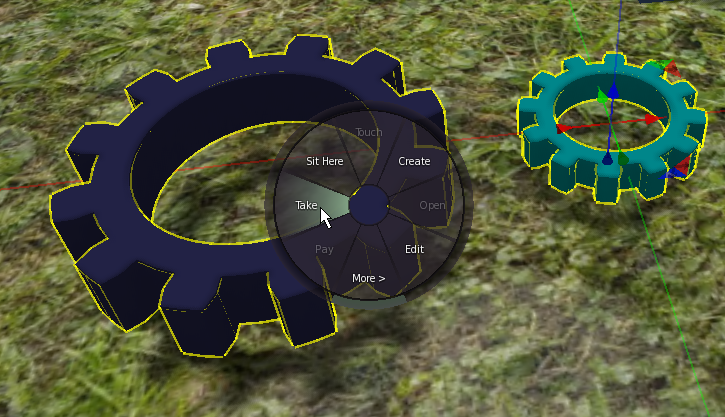
Note that you can only put the name of one thing here but if you wish your machine to make more than one item then you can achieve that by using coalesced objects (sometimes called a combined object) Rez the items you wish to use as the ‘product – in this case we have an ‘SF Cog’ and an ‘SF Gear’ so we select one to edit and then we shift select the second object.
Now from the right menu click do a ‘Take’ and you will get this coalesced object in your inventory. Rename it to something unique (you don’t need the SF part)
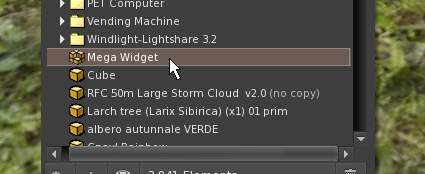
PRODUCT=Mega Widget
There are a few other options you can use in the recipe and they are covered in section 14.1 You can also add comments by starting the line with # and use spacing to make it clearer to read.
You can then repeat the above to add more recipes. The end of recipes is marked by [END]
[END]
For this example the recipe notecard will be:
@VER=1
#
[Widget]
    DURATION=120
    INGREDIENTS=50% Aluminium, Wood or kWh
    PRODUCT=Mega Widget
[END]
(b) Extra features
Visibility
If you name one or more of the prims show_while_cooking those primes will be shown (alpha 0%) during cooking only, and hidden afterwards. You can set an arbitrary alpha level for the link like 0.5 by naming it show_while_cooking 0.5
Rotation
If you name any of the prims in the spin <0,2.0,0> they will spin in the specified vector local axis with a spin rate of 2 whilst the cooking task is active. You can change the vector to point to the direction and spin rate that you wish.
Extra features
If you plan to create more complex functionality you should add an addon script to the processor. Do not modify the main script as your changes will be overwritten in the next release of the farm. The machine script sends a number of link_messages when actions happen. Search the machine.lsl script for llMessageLinked lines to see those messages and use them in your addon.

This work by Buzzy Cnayl is licensed under a Creative Commons Attribution-NonCommercial-ShareAlike 4.0 International License.
Based on a work at https://satyrfarm.github.io/


