- Detalles
- Read Time: 11 mins
13.1 DESARROLLE SUS PROPIOS ARTÍCULOS
Una de las grandes ventajas del sistema 'SatyrFarm' es que es totalmente de código abierto y está diseñado para ser fácilmente ampliado y personalizado. El resto de esta guía trata sobre cómo personalizar los objetos existentes y crear otros nuevos. Siempre estamos ansiosos por añadir nuevos elementos a la versión VivoSim del sistema, que no para de crecer, así que no seas tímido, si creas algo nuevo, ¡no dudes en compartirlo!
Probablemente la forma más fácil de empezar es modificando los elementos existentes, pero eres libre de utilizar los scripts en otros elementos, aunque te recomendamos que utilices los últimos scripts del repositorio de VivoSim en https://github.com/punyauk/VivoSim, especialmente si planeas compartirlos. También debes asegurarte de que cada ítem y todos los ítems que contenga en su inventario de forma recursiva deben ser full perm, de lo contrario tu producto no funcionará para otros usuarios.
13.2 ALMACENAMIENTO
(b) El botón Nuevo Stock
Puede utilizar este botón para buscar productos cercanos e intentar añadirlos al almacén. Para ello, el almacén comprueba otros almacenes que tengan activado el modo compartir (por defecto) y también las unidades de intercambio de la región. Si el producto se encuentra en alguna de esas ubicaciones, se añadirá a esta unidad de almacenamiento. Esta es una manera fácil de cambiar lo que contiene una unidad de almacenamiento, pero está limitada a sólo poder añadir productos que ya existen en algún otro lugar de la región.
Tenga en cuenta que el artículo debe tener P; al principio de la descripción para que sea reconocido como producto. Este es el estado normal para cualquier producto que ha sido rezzed de una máquina, planta, etc. Pero si se trata de un artículo nuevo, basta con poner P en la descripción ;
(b) Añadir un producto al Barril del Almacén SF
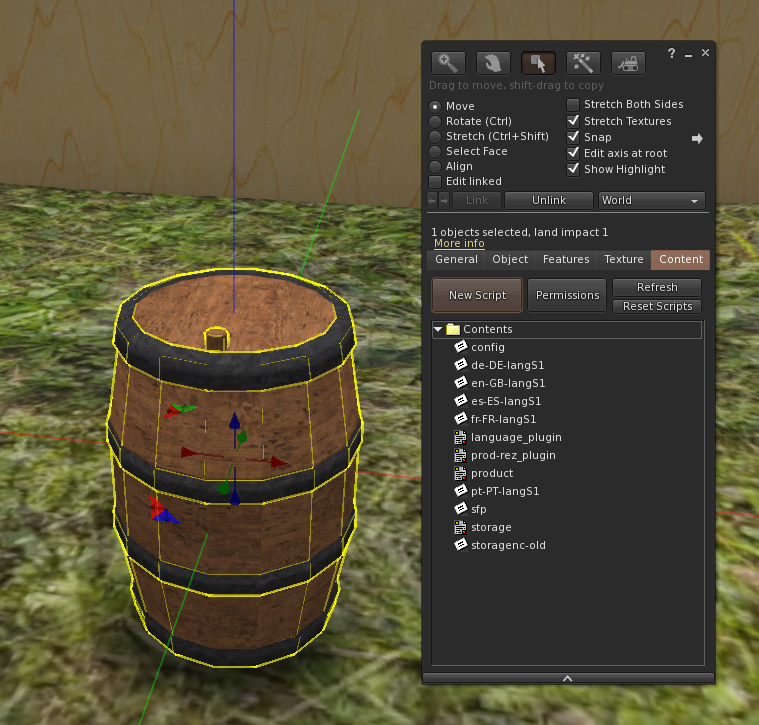
Probablemente la forma más fácil de almacenar un nuevo producto que ha creado es modificar el Barril del Almacén SF existente. También puede recoger algunas cajas de almacenamiento "plantilla" vacías en la tienda Mintor. El script de almacenamiento se configura automáticamente para cualquier producto de su inventario, así que si tiene un nuevo producto, sólo tiene que colocar una copia dentro del Almacén SF.
Ejemplo
Empezaremos rezzando uno de los barriles de almacenamiento simples. Haga clic derecho para editar y eche un vistazo a la pestaña Contenido. Verás varios scripts y notecards que se tratan con más detalle en el capítulo 14.
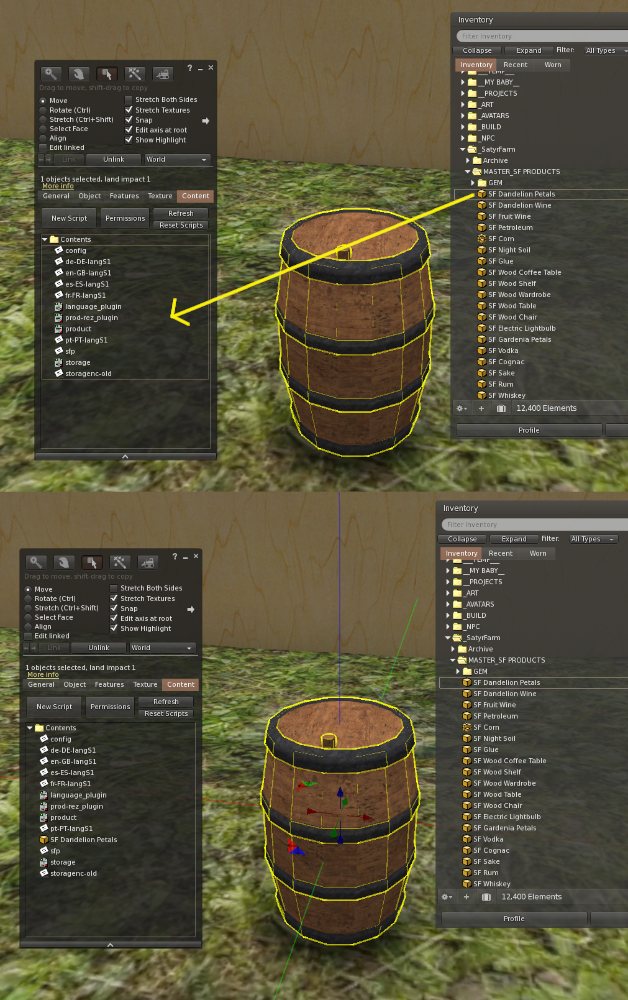
Por ahora todo lo que tenemos que hacer es arrastrar el producto de nuestro inventario al contenido del barril. Como ejemplo, tenemos un producto pétalo de diente de león que deseamos almacenar, así que lo arrastramos desde nuestro inventario al área de Contenidos.
¡Una vez que haya arrastrado el artículo, haga clic en el botón Restablecer Scripts y debería ver que ahora tiene un lugar de almacenamiento para los pétalos de diente de león!
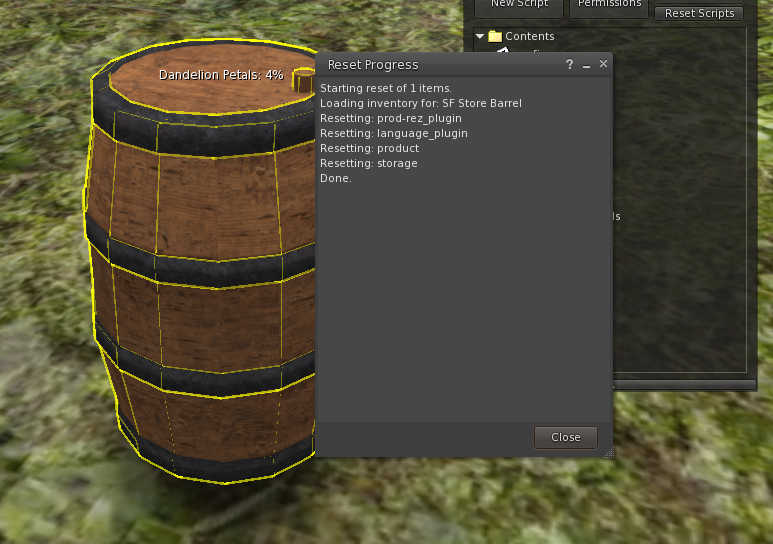
Así como el tipo de almacenamiento de un solo elemento que acabamos de hacer, podemos hacer unidades de almacenamiento que contengan varios elementos. Hay dos tipos que podemos hacer, el primero muestra los niveles de todos los elementos en un bloque de texto flotante. El segundo nos permite mostrar múltiples textos flotantes para cada artículo del almacén.
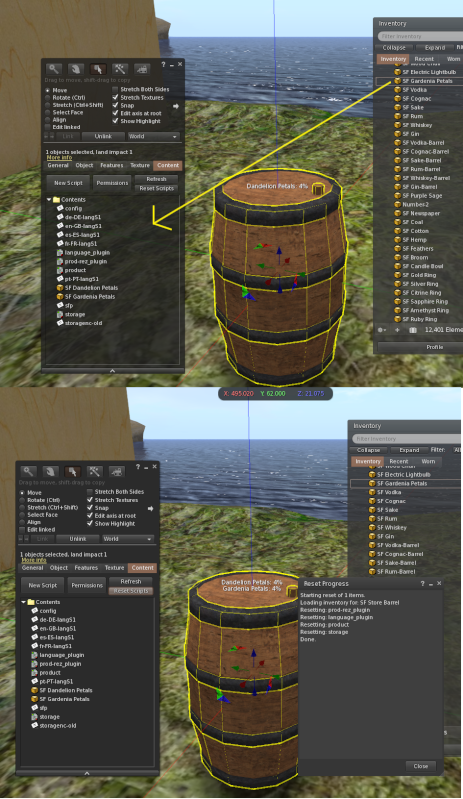
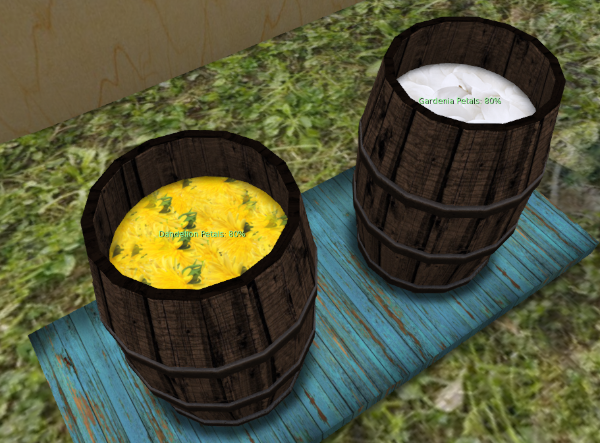
Empecemos primero con el tipo de texto flotante simple ya que todo lo que necesitamos hacer es arrastrar otro producto al contenido de nuestro almacén existente. Como ejemplo añadiremos pétalos de gardenia a la tienda.
Haga clic con el botón derecho y seleccione Editar y de nuevo vaya a la pestaña Contenido y arrastre a ella el nuevo artículo (pétalos de gardenia en nuestro ejemplo) luego haga clic en el botón Restablecer Scripts y verá que ahora tenemos un almacén para dos artículos.
Podemos añadir tantos elementos como queramos a este tipo de almacén pero, por supuesto, si añadimos muchos puede ser difícil de leer en un gran bloque de texto flotante, además el número de caracteres en el texto flotante es limitado por lo que puede que no aparezcan todos los elementos.
Podemos utilizar otro tipo de almacenamiento que nos permite tener múltiples textos flotantes para cada artículo - probablemente ya ha visto algunas de las unidades de almacenamiento que hacen esto como el Almacenamiento Básico SF y el Rack de Almacenamiento SF.
La creación de este tipo de almacenamiento sigue el mismo proceso que ya hemos hecho, pero con algunos pasos adicionales.
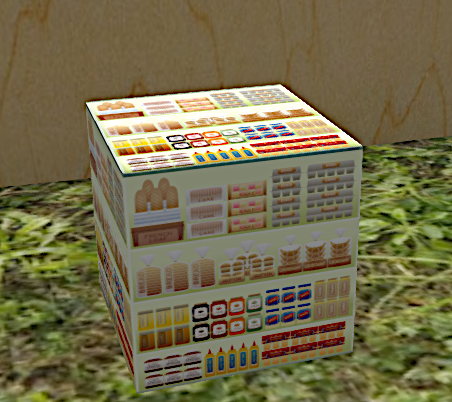
Empezaremos con el SF Storage Template que es un cubo simple que puedes usar como punto de partida para tus propios diseños.Este es solo un sistema de almacenamiento vacío así que podemos agregarle productos como antes. Para este ejemplo utilizaremos los pétalos de diente de león y gardenia de nuevo para que podamos ver cómo este almacenamiento se compara con el tipo anterior.
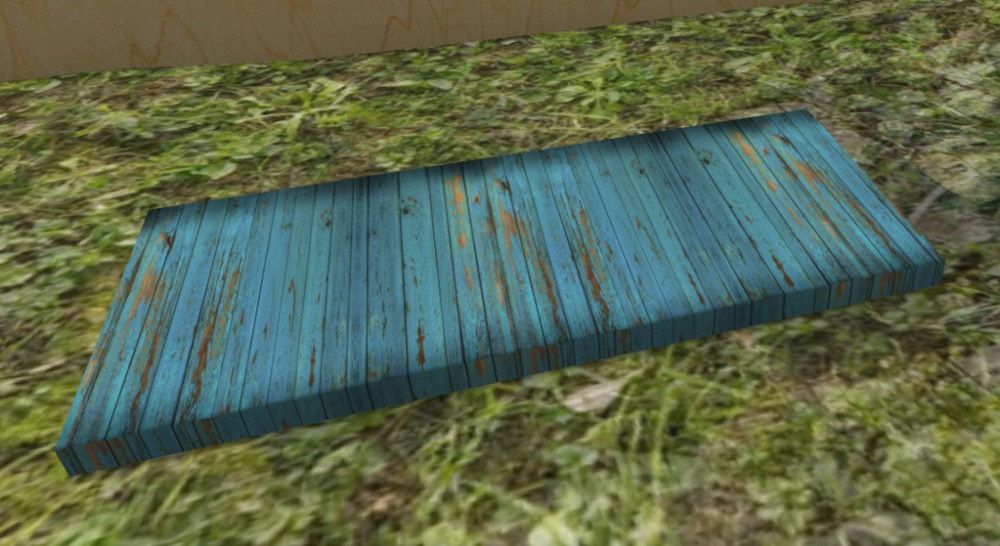
El diseño del sistema de almacenamiento depende mucho de ti, pero en este caso vamos a hacer un estante de almacenamiento sencillo.
Primero aplanamos la caja para darle forma de plataforma y le cambiamos la textura a una madera desgastada.
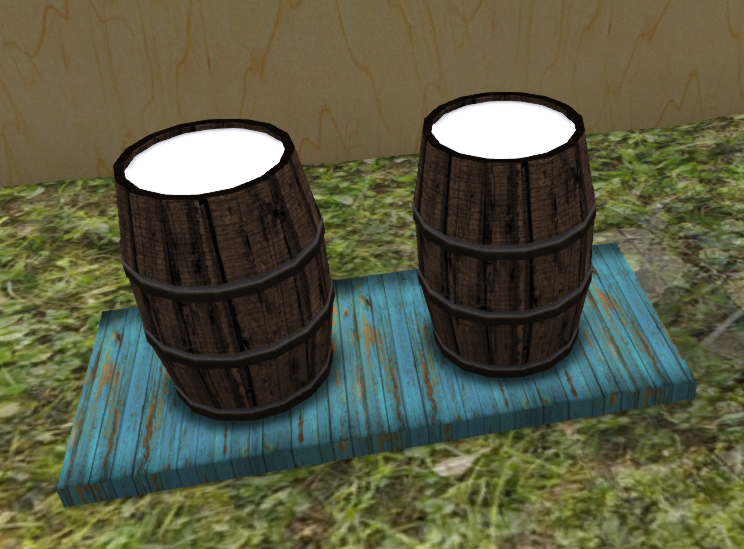
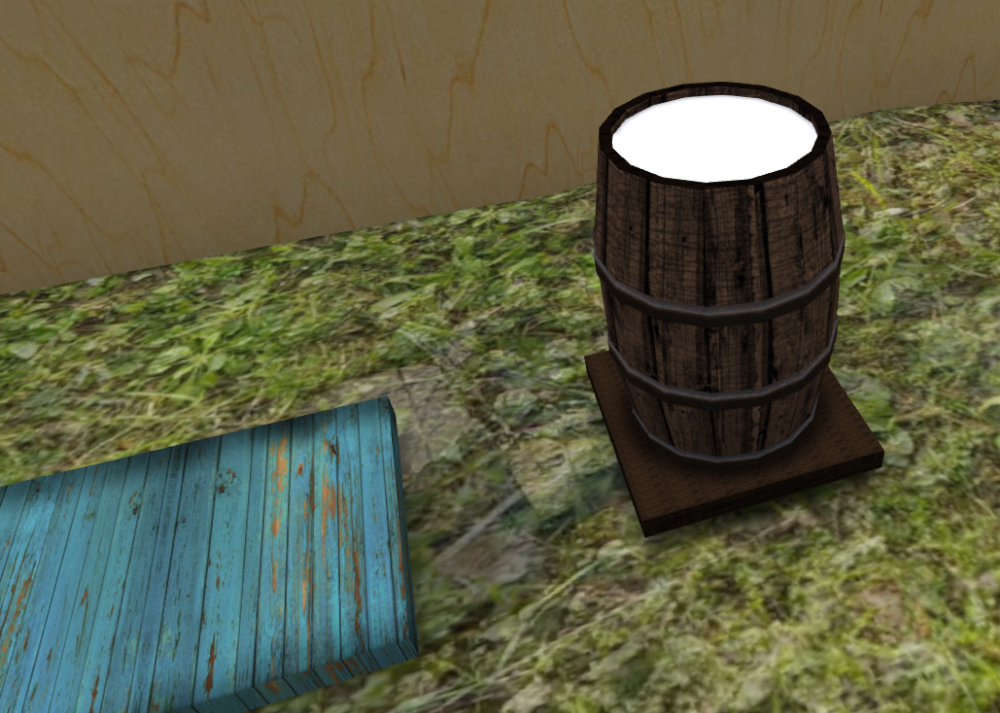
Ahora tenemos que añadir un prim para que actúe como indicador de los pétalos de diente de león y otro prim para los pétalos de gardenia. Para ello vamos a empezar con uno de los barriles de la tienda de SF que tiene un prim nivel de textura, pero se puede utilizar cualquier prim único que se adapte a su diseño.
Este barril de la tienda ya tiene todos los componentes de almacenamiento en el prim base, pero como ya tenemos una base para usar vamos a desvincular ese prim del barril de la tienda. Como queremos indicadores para dos productos, haremos una copia del barril y posicionaremos ambos barriles sobre nuestra base de almacenamiento.
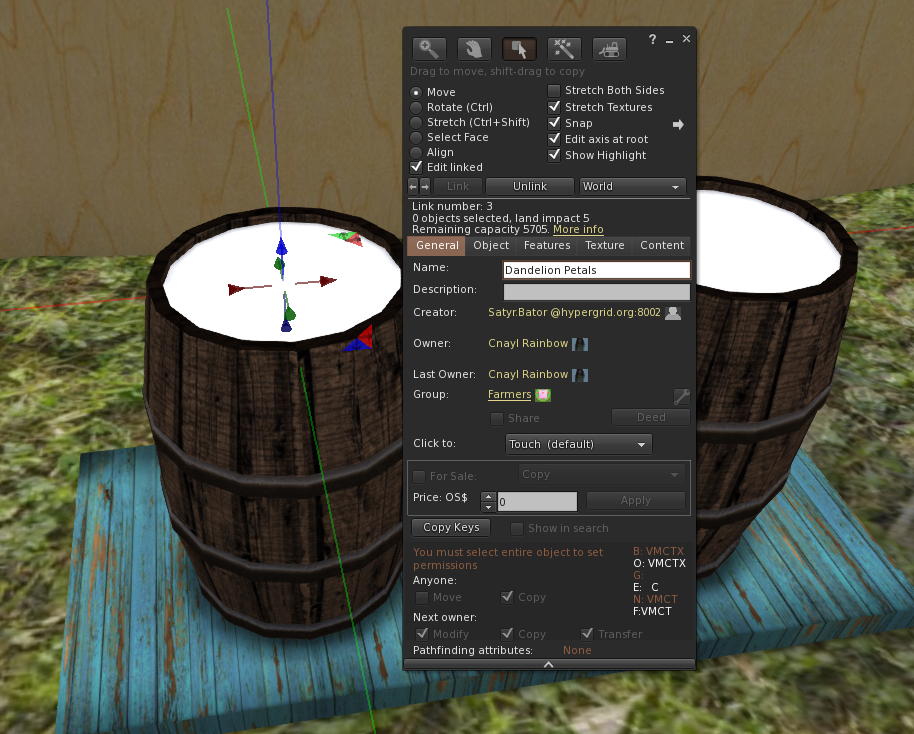
A continuación, enlazamos todos los componentes asegurándonos de que la base es el último prim en ser enlazado (por lo que es el prim raíz)
Ahora tenemos que configurar los dos prims que van a ser nuestros indicadores de nivel. Configuramos el nombre del prim que queremos utilizar como indicador de nivel para que coincida con el nombre del producto (menos la parte SF), así que en este ejemplo configuraremos un prim llamado Pétalos de diente de león y el otro Pétalos de gardenia.
Como siempre, debes asegurarte de que el nombre y las mayúsculas coinciden exactamente con el producto; por ejemplo, si uno de los prims se llamara Pétalos de diente de león , no funcionaría.
Ahora todo lo que tenemos que hacer es añadir los pétalos de diente de león y los pétalos de gardenia al contenido de nuestra nueva unidad de almacenamiento. En cuanto lo hagas deberías ver los indicadores de nivel de ambos productos.
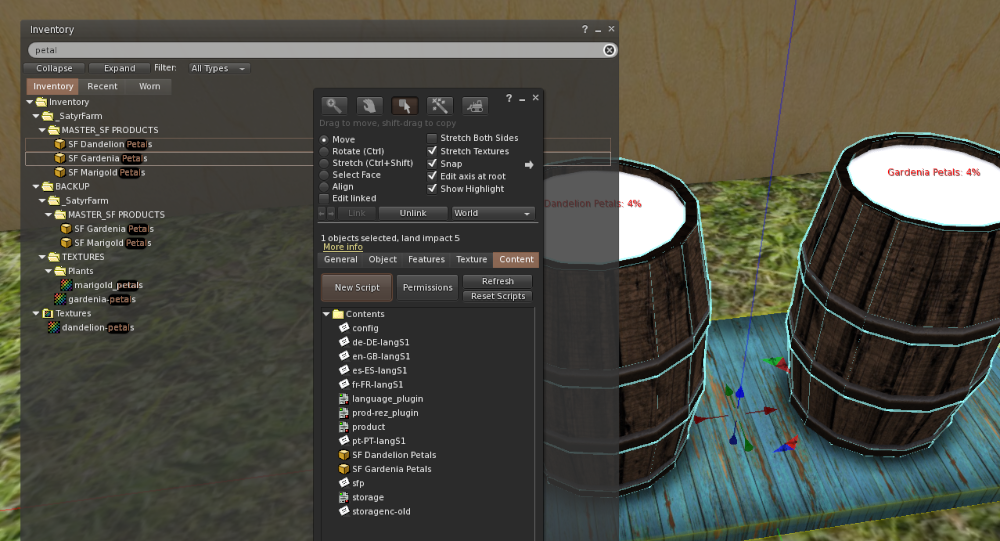
A continuación, puede cambiar las texturas del blanco en blanco a algo que coincida con su producto.
Si queremos ir un paso más allá, podemos configurar esta unidad de almacenamiento para que los prims indicadores se muevan hacia arriba y hacia abajo para reflejar los niveles reales del producto. Para ello tenemos que calcular algunos números para poner en el indicador prims Descripción
Primero anota la posición del objeto - sólo necesitamos el valor Z
I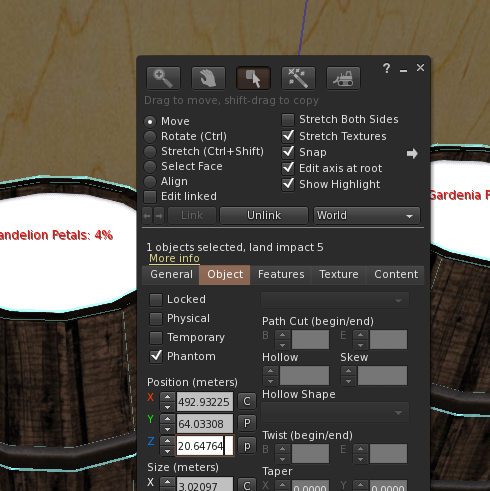 n nuestro caso es 20.64764
A continuación tomamos nota del valor Z del indicador prims para cuando nos está mostrando 0% y 100%
100% = 21.900
0% = 20.81450
Ahora podemos calcular los valores necesarios para la descripción del indicador prim
20.81450 - 20.64764 = 0.16686
21.900 - 20.64764 = 1.25236
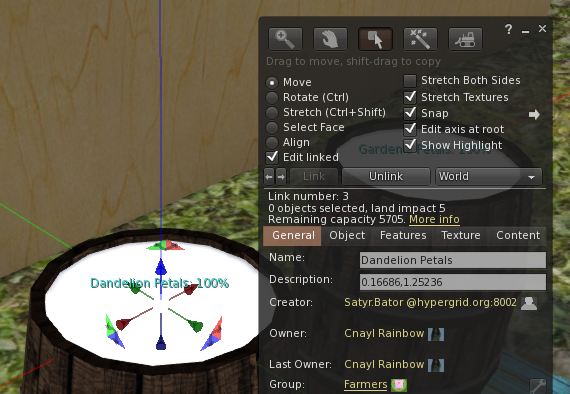
Así que ahora sólo tenemos que establecer el prim Descripción a 0.16686,1.25236
Como sólo nos interesa el movimiento Z podemos usar los mismos valores para ambos prims.
Para comprobar que todo funciona, edita la notecard de configuración y establece primero el nivel inicial al 100%
NIVEL_INICIAL=100
Guarda la notecard y reinicia los scripts y deberías ver la indicación del 100%. Ahora edita la tarjeta de nuevo y esta vez fija el nivel en 0%.
NIVEL_INICIAL=0
Ahora cuando reinicies deberías ver la posición 0%.
Edita la notecard de configuración para poner el valor de INITIAL_LEVEL al valor que quieras usar (el valor por defecto es 4) y ¡ya estás listo para empezar a almacenar cosas!
Nombrando tu almacén
Puede cambiar el nombre de su nuevo almacén a cualquier cosa que desee, como SF Petal Store
Si tiene la intención de utilizar los productos de este almacén junto con la opción AutoFeed en los comederos de animales, sólo tiene que actualizar la notecard de configuración en ellos para tener el mismo nombre configurado. También es posible que desee añadir a la actualizables notecard si está utilizando el SF Updater-Storage
Compartir
Esto permite a otros elementos, como el intercambio, para acceder a la unidad de almacenamiento y tomar una copia de cualquier elemento. Cuando hacen esto no afecta al nivel de almacenamiento. Es una forma útil para que cosas como la bolsa puedan ampliar la gama de artículos que tienen en oferta para incluir nuevos productos.
Texto flotante
Por defecto, una tienda mostrará los niveles de todos los productos que contiene como una lista de texto flotante. Para las tiendas que tienen muchos artículos esto puede ser un poco difícil de leer por lo que puede que desee añadir prims vinculados adicionales para tener texto flotante sobre cada uno mostrando el estado de los productos individuales. Por ejemplo, en el caso de las aceitunas SF, la prim vinculada denominada "Aceitunas" se utiliza para mostrar el texto sobre el nivel actual de aceitunas SF. Tenga en cuenta que la prim raíz seguirá mostrando los niveles de cualquier producto almacenado que no tenga su propia prim con nombre en el conjunto de enlaces.
Se trata de una cuestión puramente estética, ya que no se almacena nada en estas prims adicionales.
Configuración de las fichas
Probablemente el elemento principal de la configuración de la Notecard que usted puede necesitar ajustar para su nueva tienda es el REZ_POSITION
# INITIAL_LEVEL=4 # Cuánto se toma/añade al usar ONE_PART=2 # Cuántos días antes de que el nivel baje 1 parte DROP_TIME=14 # # Cuál es el máximo que puede almacenar este almacén (100 da los niveles de stock en %, más de 100 da los niveles como e.g. 25/110 ) MAX_FILL=100 # ASC para ordenación ascendente (de A a Z) o DEC para ordenación descendente (de Z a A) SORTDIR=ASC # # Desplazamiento para rez artículo REZ_POSITION=<0.0, 0.0, 1.5> # # Distancia de búsqueda de artículos SENSOR_DISTANCE=10 # # Cuota de producto por región. Todos comparte con todos, Grupo sólo con el mismo grupo, Ninguno no comparte SHARE_MODE=Todos # Establecer en 1 para permitir que cualquier miembro del grupo para utilizar el botón de menú 'Añadir Stock', 0 para permitir sólo propietario GROUP_STOCK_ADD=0 # #Float color del texto - establecer como vector de color o utilizar OFF para no texto flotante TXT_COLOR=<1.0, 1.0, 1.0> # Brillo del texto 1 a 10 (10 es el brillo máximo) TXT_BRIGHT=10 # # Idioma por defecto LANG=es-GB # # Cámbielo si sus productos no empiezan por 'SF' SF_PREFIX=SF
Para más información sobre el sistema de almacenamiento, consulte el capítulo 14

Esta obra de Buzzy Cnayl está bajo unaLicencia Creative Commons Reconocimiento-NoComercial-CompartirIgual 4.0 Internacional.
Basado en un trabajo enhttps://satyrfarm.github.io/
- Detalles
- Read Time: 9 mins
Chapter 9 - Storage Wells & Irrigation
We have used the SatyrFarm Well and also the SF Water tower – these are both examples of the ‘storage well’ system. Items in this system gradually fill up and store one specific product and as long as the level is greater than the ‘one part’ setting you can take some of the product. For the SatyrFarm well it was water but we also can get rennet from the SF Rennet Container, yeast from the SF Yeast Container and sea water from the SF Sea Water pump etc.
There are various configuration options to allow you to put some restrictions on the system by specifying how the item functions. For example you can set that it needs to be close to something in order for the level to increase. You can specify an actual item or set it that it needs to be at sea level – the SF Sea Water pump is an example of the latter. We can also specify what ‘energy’ drives it and we can specify wind (like the first water tower we used that require a wind pump near them), grid (like the example shown in the section on electricity for setting water towers to use the grid), or ‘self’ (such as the SatyrFarm well)
	# Level to start at on rez/hard reset
	INITIAL_LEVEL=10
	#
	# What liquid is this system for
	LIQUID=Water
	#
	# How much to increase/decrease level by for one 'serving'
	ONE_PART=2
	#
	# How many days before level drops 1 part ('evaporation')
	DROP_TIME=2
	#
	# Offset to rez water buckets
	REZ_POSITION=<1.0, 0.5, 0.0>
	#
	# Set to 0 to disable menu and just rez product on touch
	MENU_MODE=0
	#
	# Set to 0 if you don't want to allow adding SF_WATER item via menu to top up level
	ACCEPT_PRODUCT=0
	#
	# Can be WIND, GRID, SELF or RELAY which relates to using Wind powered water pump, Electric pump, built in system or via another nearby storage-well
	MODE=RELAY
	#
	# In RELAY mode, where to get water from
	RELAY_WELL=SF Water Tower
	#
	# Set to 1 for clouds, rain and other effects
	WEATHER=1
	#
	# If WEATHER=1 set the range of the rain in m
	RAIN_RADIUS=35
	#
	# How often in seconds to increase level by ONE_PART if MODE=SELF
	WATERTIME=600
	#
	# SEA_LEVEL forces it to be at sea level to work. Can also specify item to scan for or remove/comment out if not needed
	REQUIRES=SEA_LEVEL
	#
	# radius in m to scan for REQUIRES item
	RANGE=6
	#
	# Default language
	LANG=en-GB
(A) Examples of the various settings
LIQUID=
This is the item that is produced such as water, sea water, yeast etc. If this item is not in the contents as a product (e.g if LIQUID=Water the the product is SF Water) the system will check with storage locations to try and find a copy and if it is unable to find it then it will show on float text that it needs that item.
MENU_MODE=
If set to 1 then menu mode is enabled and touching the item will give you a menu. If set to 0 this disables the menu and touching immediately rezzes the product. If you are using the NPC Farmer then the item that it uses to fetch water must be set this way.
ACCEPT_PRODUCT=
If menu mode is active, you can enable or disable the option to allow you to top up the storage well via the ‘Add’ button
MODE=
The options are WIND which requires an SF Wind Pump nearby, GRID which allows it to take power from the electricity grid, RELAY which allows you to link wells together and SELF which means it does not require energy.
REQUIRES=
If you enter SEA_LEVEL then the Z height position should be near to the regions Water Height setting in order for it to operate.
You can also specify the name of something that needs to be close to the well for it to work. As an example you may decide that for producing yeast, the well needs to be close to the SatyrFarm Distillery so you would edit the notecard to have the line:
REQUIRES=SatyrFarm Distillery
If you do not require anything for operation, just remove or comment out the REQUIRES= line
WEATHER=
Setting this to 1 will enable anyweather or other special effects system. You can find more information on creating your own weather and effects systems in chapter 13.9
9.1 IRRIGATION
Plants, animals and mining all require water. There are various ways to get the water to where it is needed and you can use one or a combination of the following:
(A) Manual watering
You take water from any of the storage wells that are set to give water. As the SF Water is product, you can touch it and have it follow you as you go to the item that requires water. Don’t forget you can have more than one bucket follow you but don’t get to ambitious – 4 or 5 is probably a good maximum! You can also use one of the watering carts if you don’t fancy to much walking!
Manual water means you don’t need to have any storage wells near things but you do need to keep an eye on water levels, as if they get to low for to long plants and animals may die on you!
(B) NPC Farmer watering
The NPC farmer can be used to water plants and animal feeders. You need to ensure that there is a storage well within the farmers range that has menu mode disabled, since the farmer expects to just touch it to get the water.
NPC farmers visit items on a relatively random basis and only know if to water an item when they visit it, so if you have too many items for the NPC to manage it may miss items that are in desperate need of water!
(C) Auto watering
Anything that needs water has an ‘auto’ option. Turning this on means the item will look to automatically get water from the closest source. Check the config notecard to see if there is an option to set the source, if not then it will be looking for a storage well called SF Water Tower The limit for searching is a 96m radius. Note also that if the closest storage-well found is not in the same group as the thing requesting it, an error message is given. If you have plants, animal feeders etc. That are close to a neighbours water towers, you may see this error message and then need to either move your items or put a water source closer to them.
Generally the water level can get quite low before the plant, feeder etc. Calls for more water. If you have to many items trying to get water from the one storage well then it’s possible the well may not be able to fill up quickly enough to meet the demand, and so you should keep an eye on how much things use.
As we have seen there are various ways to configure these water towers:
Wind mode
The ‘SF Wind Pump’ will start gradually filling with water after it is first rezzed and when it gets to 100% (about 2 hours from a fresh rez) it sends one portion of water to the closest item called “SF Water Tower” (note though that the maximum distance between the two can be no more than 96m) The wind pump will now continue to send one portion at regular intervals (approx 15-20 minutes)
If the demand on the water tower is too high it may run out of water before the next load is sent from the pump. A wind pump can only supply one water tower.
Grid mode
When the water level in a grid mode storage-well drops below about 40% it will send a request to the regional (electric) water pump for more water. The pump first checks there is enough power in the grid and if so will start and send water to the requesting storage-well.
Relay mode
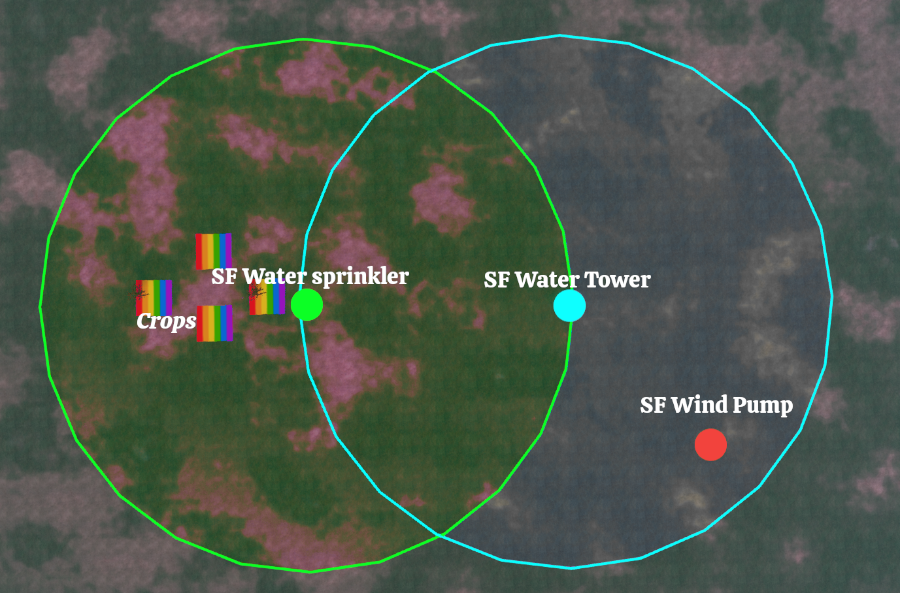
In relay mode you can set one storage well to get water from another storage well. As an example you could put out some SF Water sprinklers near your plants and set the plants to get their water from the sprinklers. Then you set the sprinklers to get their water from the SF Water Tower.
The blue circle shows the range of the main water tower and the green circle is the range of the water sprinkler. You could add more sprinklers anywhere in the blue circle to extend the range even further.
- Detalles
- Read Time: 1 min
2.4 - Getting assistance
(a) The NPC Farmer
Perhaps you would like a ‘farm hand’ to help with odd jobs around the farm?
The pillar next to the water tower is the control system for an NPC Farmer (NPC means ‘non-player character’ see http://opensimulator.org/wiki/OSSLNPC)
We can have an NPC Farmer help us with some basic chores.
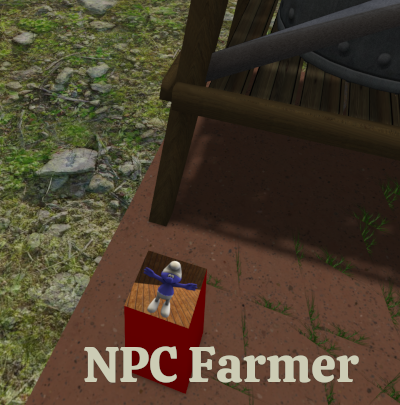
How does the Farmer NPC Work?
The Farmer NPC is constantly looking for farm items within range (set via the config notecard which we will cover soon). It will try to get water and then water plants with less than 30% water. The farmer will harvest plants and put their harvest in the configured storage location.
The farmer can also be set to cook slop and then store that away also. So the NPC Farmer can completely sustain a small farm, assuming that non-grass animal feeders have AutoFood set to on.
Troubleshooting
When rezzing an NPC , it should appear right in front of the rezzer box. If they are rezzed at the edge of the sim instead, this means you have closed access to your parcel. This will cause the NPC to fail. Please allow access to the parcel - the NPC will use the group of the controller and make sure age restriction is off.
If the farmer rezzes okay but just stands still, this is normally because the NPC rezzer box is set to a different group to the parcel. Click the rezzer to remove the NPC then change so that both land and rezzer are in same group. You should now find that the farmer sets off to the well as soon as it appears.
All currently available NPC Farmers
2.1 Setting Up OpenSim
(a) Opensim - Versions and configuration
The VivoSim system has been built and tested to work on the official release versions of opensim 0.9.0.1 onwards. It supports both XEngine and YEngine. Anything that uses physics will have a note to tell you if it is designed for one particular type or can auto-sense the physics engine.
Please note that if you use builds other than that from opensimulator.org things may or may not work as I can't test every version, unfortunately!
(b) Setting Standard Permissions
Before using (or even rezing) any parts of this system in your region, you should ensure that you have the correct permissions for the required OSSL functions by editing the settings in the osslEnable.ini file (in bin/config-include folder) If you do not have access to this file you will need to get your region host to change them for you. Note that in newer versions of OpenSimulator you may need to copy osslEnable.ini.example to osslEnable.ini
[NOTE: in opensim ini files the ; symbol at the start of a line turns it into a comment. In the following, we comment out the first two lines and uncomment the next two]
  osslParcelO = ""
  osslParcelOG = ""
  ;osslParcelO = "PARCEL_OWNER,"
  ;osslParcelOG = "PARCEL_GROUP_MEMBER,PARCEL_OWNER,"
  ; osslParcelO = ""
  ; osslParcelOG = ""
  osslParcelO = "PARCEL_OWNER,"
  osslParcelOG = "PARCEL_GROUP_MEMBER,PARCEL_OWNER,"
Then add/edit the various function levels to:
; ThreatLevel  VeryLow
Allow_osSetDynamicTextureDataBlendFace = ${OSSL|osslParcelOG}ESTATE_MANAGER,ESTATE_OWNER

; ThreatLevel  Low
Allow_osMessageObject = ${OSSL|osslParcelOG}ESTATE_MANAGER,ESTATE_OWNER

; ThreatLevel  High
Allow_osMakeNotecard = ${OSSL|osslParcelOG}ESTATE_MANAGER,ESTATE_OWNER

; ThreatLevel  VeryHigh
Allow_osGetNotecard = ${OSSL|osslParcelOG}ESTATE_MANAGER,ESTATE_OWNER
Next, to make sure everything works as it should, change your active group to match that of the parcel that your farm is in. You should make sure all farm items are set to that group.
(c) Setting Permissions for NPC Farmer
If you plan to use any NPC Farmers then the following additional setting is required:
; ThreatLevel  Moderate
Allow_osSetSpeed=ESTATE_MANAGER,ESTATE_OWNER,PARCEL_OWNER
Also edit your OpenSim.ini
[NPC]
Enabled = true
(d) Setting Permissions for fishing system
If you plan to use the fishing system then the following additional setting is required:
; ThreatLevel  VeryHigh
Allow_osForceDetachFromAvatar=ESTATE_MANAGER,ESTATE_OWNER,PARCEL_OWNER
(e) Setting Permissions for VivoSim Exchange
If you plan to put out any exchange boxes then the following additional settings are required:
; ThreatLevel  Moderate
Allow_osGetGridLoginURI=${OSSL|osslParcelO}ESTATE_MANAGER,ESTATE_OWNER
(f) Setting Permissions for Rental system
The default ossl settings will allow the estate owner and managers as well as the parcel owner to use the rental system. If you are getting errors, or you wish to also allow group members to use it, you should set/edit the following:
; ThreatLevel  Moderate
Allow_osGetGridHomeURI=${OSSL|osslParcelOG}ESTATE_MANAGER,ESTATE_OWNER
(g) Dealing with errors
If you are getting permission errors make sure the above permissions are correctly set. You can get an OSSL Tester box at the VivoSim store on Mintor - rez this and it will check things are set up okay.
Next, to make sure everything works as it should, change your active group to match that of the parcel that you will rez the platform in. Anyone that is a member of that group will be able to interact with the farm. That group should have Object Entry and Run Scripts permissions.
If you have any problems setting the above up,
please do use the VivoSim forums to get assistance.
(h) Selecting languages
This guide and the default settings for all items is to use UK English, however, you can change the language items used from the @ button on menus. You can also edit the config notecard to set the default language.
If your preferred language is not shown please do let me know and I will look into adding it.
We are also grateful if anyone wishes to translate this guide into other languages (see https://translate.vivosim.net)
- Detalles
- Read Time: 4 mins
These are the default settings for all animals. For all animals touching them and selecting Info from the menu will tell you all about them. You can edit the an_config notecard in animals to change what they eat from and more.
| Animal | Lifespan (~days) | Feeder | Milk/Eggs | Wool | Manure | Death items |
| Bantha | 200 | SF Feeder | SF Wool | ✓ | SF Meat, SF Skin | |
| Black Bear | 250 | SF Feeder | ✓ | SF Meat, SF Skin | ||
| Boar | 90 | SF Hog Feeder | ✓ | SF Meat, SF Skin | ||
| Bosk | 150 | SF Feeder | SF Bosk Milk | SF Wool | ✓ | SF Meat, SF Skin |
| Brachiosarus | 200 | SF Feeder | ✓ | SF Meat, SF Skin | ||
| Buffalo | 180 | SF Feeder | SF Milk | ✓ | SF Meat, SF Skin | |
| Bulldog | 200 | SF Dog Feeder | SF RIP | |||
| Camel | 100 | SF Feeder | SF Wool | ✓ | SF Meat, SF Skin | |
| Cat | 200 | SF Cat Feeder | SF RIP | |||
| Cow | 40 | SF Feeder | SF Milk | ✓ | SF Beef, SF Skin | |
| Crocodile | 200 | SF Tiger Feeder | SF Meat, SF Skin | |||
| Dolphin | 100 | SF Fish Feeder | SF Fish | |||
| Donkey | 50 | SF Feeder | ✓ | SF Meat, SF Skin | ||
| Duck | 30 | SF Chicken Feeder | SF Duck Egg | SF Feathers | SF Duck Meat | |
| Elephant | 200 | SF Feeder | ✓ | SF Meat, SF Skin | ||
| Elk | 60 | SF Feeder | ✓ | SF Meat, SF Skin | ||
| Farm Chicken | 30 | SF Chicken Feeder | SF Eggs | SF Feathers | ✓ | SF Chicken |
| Fox | 90 | SF Dog Feeder | SF Meat, SF Skin | |||
| Gem Dolphin | 120 | SF Fish Feeder | SF Fish | |||
| Giraffe | 200 | SF Feeder | ✓ | SF Meat, SF Skin | ||
| Goat | 40 | SF Feeder | SF Milk | SF Wool | ✓ | SF Meat, SF Skin |
| Great Dane | 200 | SF Dog Feeder | SF RIP | |||
| Hog | 90 | SF Hog Feeder | ✓ | SF Pork, SF Skin | ||
| Horse | 200 | SF Feeder | ✓ | SF Meat, SF Skin | ||
| Husky | 200 | SF Dog Feeder | SF RIP | |||
| Labrador | 200 | SF Dog Feeder | SF RIP | |||
| Leopard | 100 | SF Tiger Feeder | SF Meat, SF Skin | |||
| Lion | 150 | SF Tiger Feeder | ✓ | SF Meat, SF Skin | ||
| Llama | 100 | SF Feeder | SF Milk | SF Wool | ✓ | SF Meat, SF Skin |
| Monkey | 300 | SF Feeder | ✓ | SF RIP | ||
| Living Rock | 300 | SF Rock Feeder | SF Mineral | SF Clay, SF Rock Skin | ||
| Monster | 200 | SF Tiger Feeder | ✓ | SF Meat, SF Skin | ||
| Ostrich | 300 | SF Chicken Feeder | SF Ostrich Egg | SF Feathers | ✓ | SF Ostrich Meat, SF Feathers |
| Panda | 200 | SF Feeder | ✓ | SF RIP | ||
| Penguin | 100 | SF Fish Feeder | ✓ | SF Meat, SF Skin | ||
| Pet Rock* | 300 | SF Rock Feeder | SF Mineral | SF Clay, SF Rock Skin | ||
| Pig | 30 | SF Pig Feeder | ✓ | SF Pork, SF Skin | ||
| Polar Bear | 250 | SF Fish Feeder | ✓ | SF Meat, SF Skin | ||
| Rabbit | 30 | SF Rabbit Feeder | SF Meat, SF Skin | |||
| Rainbow Trout | 10 | SF Fish Feeder | SF Trout | |||
| Raptor | 100 | SF Tiger Feeder | ✓ | SF Meat, SF Skin | ||
| Reindeer | 60 | SF Feeder | ✓ | SF Meat, SF Skin | ||
| Rhino | 200 | SF Feeder | ✓ | SF Meat, SF Skin | ||
| Sheep | 40 | SF Feeder | SF Milk | SF Wool | ✓ | SF Lamb, SF Skin |
| Squid | 10 | SF Fish Feeder | SF Calamari | |||
| Squirrel | 200 | SF Chicken Feeder | ✓ | SF Meat, SF Skin | ||
| Stegosaurus | 200 | SF Feeder | ✓ | SF Meat, SF Skin | ||
| Swan | 200 | SF Chicken Feeder | SF Feathers | SF Swan Meat | ||
| T.Rex | 200 | SF Tiger Feeder | ✓ | SF Meat, SF Skin | ||
| Tauntaun | 200 | SF Feeder | SF Wool | ✓ | SF Meat | |
| Tiger | 100 | SF Tiger Feeder | SF Meat, SF Skin | |||
| Triceratops | 200 | SF Feeder | ✓ | SF Meat, SF Skin | ||
| Tuna Fish | 10 | SF Fish Feeder | SF Tuna | |||
| Turkey | 30 | SF Chicken Feeder | SF Feathers | SF Turkey Meat | ||
| Turtle | 150 | SF Feeder | SF RIP | |||
| Unicorn | 300 | SF Feeder | SF Horn | ✓ | SF Meat, SF Skin | |
| Water Buffalo | 120 | SF Feeder | SF Milk | ✓ | SF Meat, SF Skin | |
| White Rhino | 200 | SF Feeder | ✓ | SF Meat, SF Skin | ||
| Zebra | 200 | SF Feeder | ✓ | SF Meat, SF Skin |
* Pet Rock renamed to Living Rock from version 5.9 onwards
- Detalles
- Read Time: 2 mins
These are the default settings for all animals. For all animals touching them and selecting Info from the menu will tell you all about them. You can edit the an_config notecard in animals to change what they eat from and more.
| Animal | Lifespan (~days) | Feeder | Milk/Eggs | Wool | Manure | Death items |
| SF Black Larl | 150 | SF Larl Feeder | ✓ | SF Sable Pelt | ||
| SF Bosk | 30 | SF Feeder | SF Bosk Milk | SF Skin & SF Bosk Meat | ||
| SF Bounding Hurt | 200 | SF Feeder | SF Raw Hurt Wool | ✓ | SF Meat | |
| SF Farm Vulo | 30 | SF Bird Feeder | SF Eggs | ✓ | SF Vulo Meat | |
| SF Giani | 30 | SF Giani Feeder | SF RIP | |||
| SF Giant Tarsk | 90 | SF Tarsk Feeder | ✓ | SF Skin & SF Tarsk Meat | ||
| SF Jungle Larl | 30 | SF Larl Feeder | ✓ | SF Jungle Pelt | ||
| SF Saru | 200 | SF Veg Feeder | ✓ | SF RIP | ||
| SF Sleen | 30 | SF Sleen Feeder | SF Raw Wool | ✓ | SF Skin & SF Meat | |
| SF Snow Larl | 30 | SF Larl Feeder | ✓ | SF Snow Pelt | ||
| SF Snow Lart | 90 | SF Lart Feeder | SF Lart Pelt & SF Meat | |||
| SF Squirrel | 200 | SF Bird Feeder | ✓ | |||
| SF Tabuk North | 60 | SF Feeder | ✓ | SF Tabuk Meat | ||
| SF Tabuk Prairie | 60 | SF Feeder | ✓ | SF Tabuk Meat | ||
| SF Tarsk | 90 | SF Tarsk Feeder | ✓ | SF Skin & SF Tarsk Meat | ||
| SF Tawny Red Larl | 30 | SF Larl Feeder | ✓ | SF Tawny Red Pelt | ||
| SF Tharlarion | 30 | SF Tharl Feeder | ✓ | |||
| SF Tumit | 200 | SF Bird Feeder | SF Tumit Egg | ✓ | SF Skin & SF Tumit Meat | |
| SF Turtle | 30 | SF Veg Feeder | SF RIP | |||
| SF Verr | 40 | SF Feeder | SF Verr Milk | SF Raw Wool | ✓ | SF Verr Meat |
- Detalles
- Read Time: 6 mins
Starter Kit – Basics
This platform contains everything you need to get started using VivoSim. If you are new to the system it is recommended to first get this box and rez the platform, then follow the tutorial at /information/user-guide
Once you have grasped the basics, you can then choose to expand if you wish using the various options in the other expansion packs.
Contents
SF Wind Pump
SF Water Tower
SatyrFarm Well
SF Feeder
SF Pig Feeder
SF Small Field
SF Square Field
SF Basic Storage
SatyrFarm Kitchen
SF NPC Controller
Pack 1 – Plants & Trees
In addition to the two fields found in the starter kit, this box contains additional plants and trees as well as two irrigation systems.
Contents
SF Big Tree
SF Maple Tree
SF Maple
SF Fig Tree
SF Olive Tree
SF Elder Tree
SF Oak tree
SF Horse Chestnut Tree
SF Walnut Tree
SF Coconut Palm
SF Flower Planter
SF Planter
SF Vine
SF Bramble
SF Marsh Field
SF Fungus
SF Wild Flowers
SF Physic Garden
SF English Herb Garden
SF Mediterranean Herb Garden
SF Fibre Crops
SF Water sprinkler
SF Water Tower (clouds and rain effect)
Pack 2 – Storage
Once you start expanding with new crops, animals, crafting etc, you will find the required additional storage systems here.
Contents
SF Storage Rack
SF Kitchen Storage
SF Fridge
SF Freezer
SF Spice Storage
SF Cake Storage
SF Bread Storage
SF Maple Syrup Store
SF Milk Storage
SF Meat Store
SF Dried Goods Store
SF Fresh Herb Storage
SF Herb Bench
SF Barrels Storage
SF Herbalist
SF Coldframe
SF Pet Supplies
SF Wood Storage
SF Wood Basket
SF Utility Storage
SF Craft Store
SF Crafting Storage
SF Clay Storage
SF Bulk Storage (juice)
SF Bulk Storage (slop & fish)
Bulk Milk Storage
SF Fuel Storage
SF Manure Storage
SF HaystackSF Vase
SF Store Barrel (yarn)
SF Store Barrel (wool)
SF Candle Storage
SF Keg Store
SF Barrel Store
SF Vase
SF Sea Water pump
SF Yeast Container
SF Rennet Container
Pack 3 – Animal extras
Once you start adding animals other than those used in the tutorial, you will need to have feeders specific to the animals needs. These are found in this pack. There is also a fishing system, bee hive and chicken coop. You can find out what feeder each animal feeds from using the ‘Information’ item on the animals menu or from the information at https://vivosim.net/help/animals
Contents
SF Feeder
SF Hog Feeder
SF Rabbit Feeder
SF Chicken Feeder
SF Tiger Feeder
SF Fish Feeder
SF Dog Feeder
SF Cat Feeder
SF Rock Feeder
SF Chicken Coop (standard and low prim version)
SF Beehive
SF Fishing
SF Fish Barrel
Pack 4 – Crafting
The items in this pack allow you to use the various products produced by plants, animals etc to make new items.
Contents
SF Crafting Workbench (2 styles)
SF Carpenter Workbench
SF Leatherwork
SatyrFarm Drier
SatyrFarm Loom
SF Spinning Wheel
SF Potters Wheel
SF Sewing Machine
SatyrFarm Extractor
SF Press
SF Shop (2 styles)
SF Smithy
SF Kiln
SatyrFarm Vat
Pack 5 – Eco converting
Converters take one ‘waste’ item and turn it into something useful!
Contents
SatyrFarm Compost
SF Quethane Generator
SF Privy (2 styles)
SF WC
SF Urinal
SF Potty (3 styles)
SF Toilet Roll Holder (2 styles)
SF Bookcase (2 styles)
Pack 6 – Food & Drink
If you have decided to use the HUD then food and drink are needed to keep you well!
Contents
SatyrFarm Wood Oven
SF Kitchen Oven
Extractor hood
SF Frying Pan
SF Hob
SF Sink
SF Salad Bar
SF Toaster
SatyrFarm Grinder
SF Hot Drinks Maker
SF Drinks maker (Soft drinks)
SF Drinks maker (Bar)
SF Blender
SF Ice Creams
SF Drying Rack
SatyrFarm Juicer (2 styles)
SF Cheese Maker (2 styles)
SF Butter Churn
SF Microbrewery
SatyrFarm Distillery
SF Wine Maker
SF Table
SF Seat (x4)
Pack 7 – Household
Although SatyrFarm started out as a farm, VivoSim extends into your house, turning it into a home.
Contents
SF Chair
SF Wardrobe
SF Wood Stove
SF Firepit
SF Shower (PMAC)
SF Dresser
SF Jewellery Box (2 styles)
SF Sink
SF Soap Dish
SF Bathroom Storage
SF Towel Rail
SF Bathtub
SF Bed (2 styles plus ‘bed prim’)
MLP Addon kit
PMAC Addon kit
Sit/Poseball Addon kit
Pack 8 – Region Power
You can use the items in this pack to set up a region wide power system.
Contents
SF Eco Generator – Water
SF Solar Panel
SF Wind Turbine (2 styles)
SF Water Tower (shiny style)
SF Electric Pump
SF Power controller
SF Generator
SF Charger
SF Electric Streetlight
SF Battery Storage
SF Treadmill
SF Electrical Addons
Pack 9 – Mining
You can mine and also grow various rocks and minerals with the items in this pack.
Contents
SF Mine
SF Pump Jack
SF Mineral Store
SF Gems (2 styles)
SF Gem Storage
SF NPC Controller (configured for SF Gems)
Pack 10 – Forestry
This pack adds new trees that are used to create woods/forests for growing and working withwood in its many forms.
Contents
SF Pine Forest
SF Maple Tree (doesn’t produce maple sap)
SF Small Maple Tree (doesn’t produce maple sap)
SF Birch Clump
SF Birch Tree
SF Larch Tree
SF Autumn Tree
SF Elm Tree
SF Shade Tree
SF Forest Store
SF Wood Seasoning
Contents - Extras
SF Saw Mill (updated version of that found in pack 11)
SF Leaf Composter
SF Campfire
SF Firepit (updated version of that found in pack 7)
SF Wood Stove (updated version of that found in pack 7)
SF Firewood Store
Pack 11 – Large items
As the name suggests, various large items can be found here. Make sure to rez the platform somewhere with lots of room.
Contents
Red Barn
SF Silo Storage (3 styles)
SF Windmill
SF Saw Mill
SF Oast House
SF Shop (2 styles)
Box 12 – VivoSim Exchange
The VivoSim Exchange lets you buy and sell items.
VivoSim HUD Box
Contains the VivoSim HUD along with other wearable items.
Contents
Main-HUD
Status-HUD
SF Pitchfork
Animal Rezzer Box
NOTE - The contents of this box are also found in the starter kit. You only need a copy of this if you already have the rezzer and a new version is released and you don't want another starter kit!
Contains the animal rezzer/updater and petifier.
Contents
Animal Rezzer
Petifier HUD
2.2 Starting Out
(a) Rez the first platform
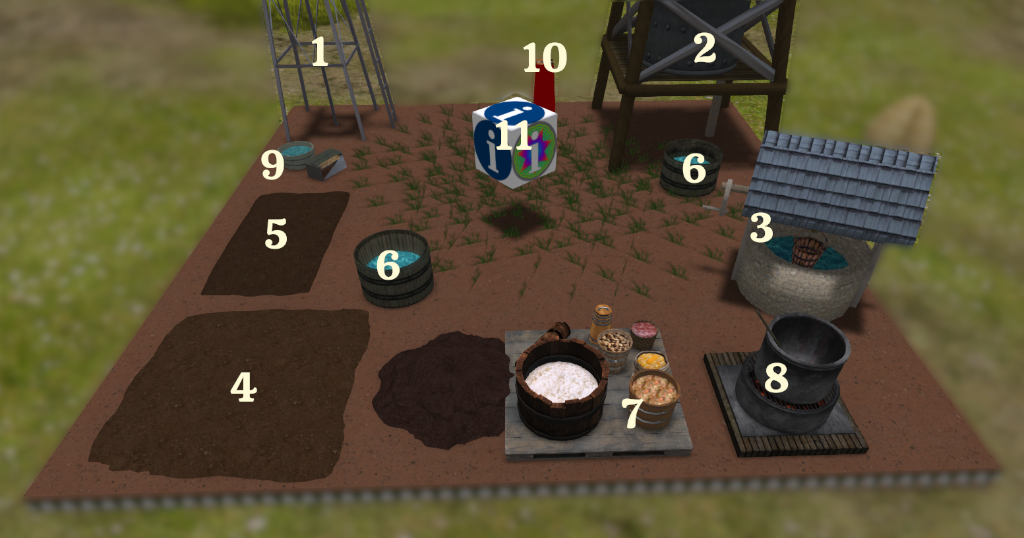
Okay, so now we are ready to rez the "START HERE" platform (found in the starter kit) The platforms all show you what size they will be when you rez them, so find a suitable space for this platform (that’s all we will be rezzing to start with).
A good idea can be to press 
 first, which activates the building Edit tool, so when you rez the platform everything will be selected and you can easily reposition it if necessary.
This platform contains everything you will need to get started and start learning how things work.
|
|
|
|
1 SF Wind Pump |
|
(b) Prepare for your first animals
A basic farm needs only a SatyrFarm Well and the SF Feeder and then it’s almost ready for certain animals (i.e. ones that can eat grass). Before we add our first animals, you may notice that the grass feeders are showing “DRINK WATER LOW” so we need to top them up. To do that touch/left click on the well and you will see a bucket of water appear.
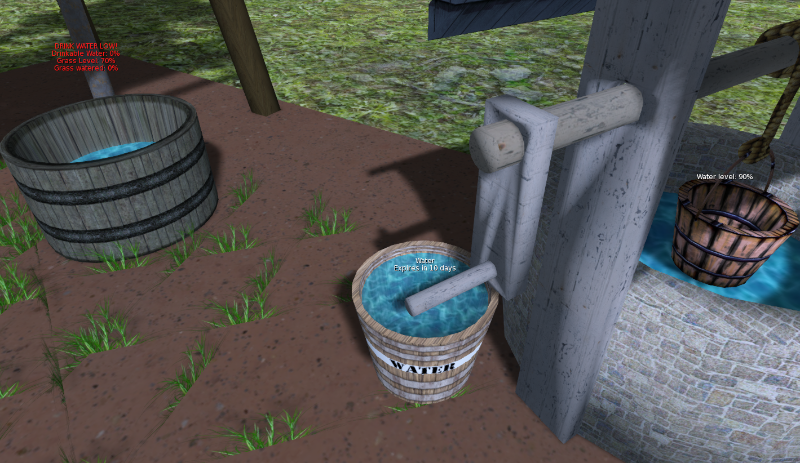
If you now touch the bucket it will move towards you and then follow you as you walk about. So head over until you are standing next to one of the feeder barrels with the water bucket also near it. Touch the feeder and you will get a menu with various options. For now, just click on the button marked Add Water. The water will empty from the bucket into the feeder and you will see the levels increase and now it says that the grass needs watering.
Get another bucket from the well and this time when you touch the feeder for the menu, select Water Grass and after a few seconds you should have some lush grass and no more red warning text over the feeder. You might also notice that the well is showing the level as 80% - each time we take a bucket of water, the level drops and then it will slowly fill back up over time.
When we add animals, they will drink the water from the feeder, plus eat the grass so it will be up to you to keep topping up the water. As your farm grows, this may start to take up way to much of your time so there is a way to make life simpler!
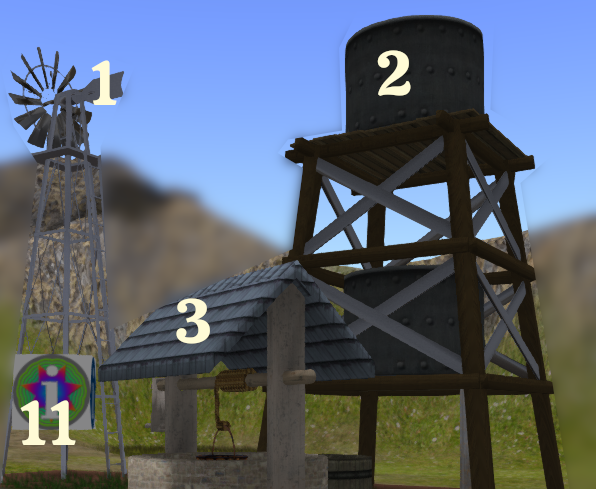
I’m sure you have noticed the wind pump and water tower? The wind pump draws water from the ground and feeds it into the nearest water tower. The water tower can then be used to automatically provide water for things that need it (at the moment just our feeder).
If you touch the second grass feeder to get the menu, you will see a button marked +AutoWater If you click this it will turn on the auto watering feature and the feeder will try to find a water tower within range (around a 90m radius) Once it finds the water tower you will see it automatically fills up. As long as there is enough water in the water tower your feeder will now never need you to add water to it – makes life easier for you doesn't it! You might want to select that option for the first feeder.
As your farm grows, you may need to add more water towers but we will cover that in more detail later on as for now, there should be plenty of water available.
(c) Add your first animals
In your inventory open the Platform 1 folder you will see an item called QSF Animal Rezzer – Quintonia-Vx (where x is the version number)
You can either rez this to the ground or select to wear it (it will be worn as a HUD), whichever you prefer.
The animal rezzer is where animals come from initially. It’s also used to update animals when new updated scripts are released.
If you have rezzed it, move it to where you would like your animal to appear (ideally next to one of the grass feeders). If you are wearing it as a HUD, the animal will be rezzed at your feet, so stand where you wish the animal to appear.
Touch the HUD/box to get the menu and select the Rez… button. There are a lot of animals to choose from but only certain ones eat grass so we will just start with those. Let’s start with a Cow. When you rez it, give it a few seconds to initialize and then you will see a happy cow!
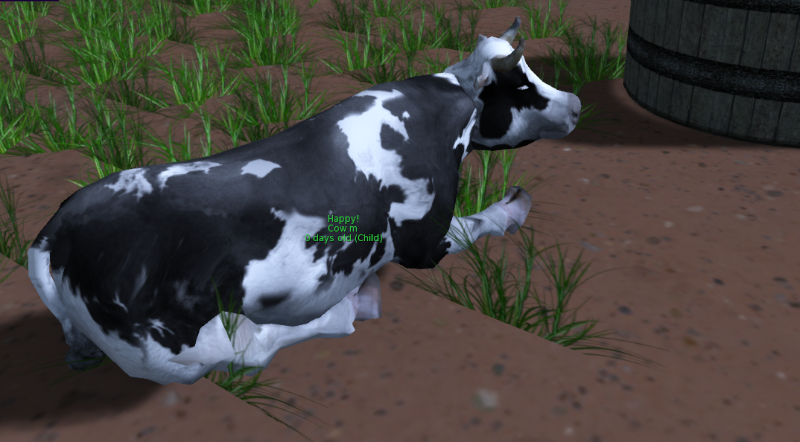
Note that your cow may be a different colour – some animals have ‘genetics’!
When your animals become adult, you can mate them so you may choose to rez another cow in anticipation of that time!
By default, the rezzer will alternate between producing male and female animals but you can change it to be random if you prefer from the options button.
You may also wish to rez a couple more animals – choose from goats or sheep (since both can eat from the grass feeder.)
So now you have your basic farm set up, the animals will eat from the feeders (which are getting water from the water tower) and will grow day by day until they become adults.
Congratulations, you are now officially a VivoSim Farmer!
2.3 - First expansion
(a) Growing crops
As you saw, there are many more animals you can add to your farm and each one has it’s own particular requirements when it comes to food. In order to raise other animals you will also need to grow various crops and make certain products to support them.
The next animals we will have on out farm will be pigs but before we rez them we need to get the farm ready for their arrival since pigs don’t eat grass but do eat slop!
To make slop we need to grow some vegetables and we will start with potatoes. In the platform you will see two patches of soil a square one (SF Square Field) and a rectangular one (SF Small Field) which is the one we will be using.
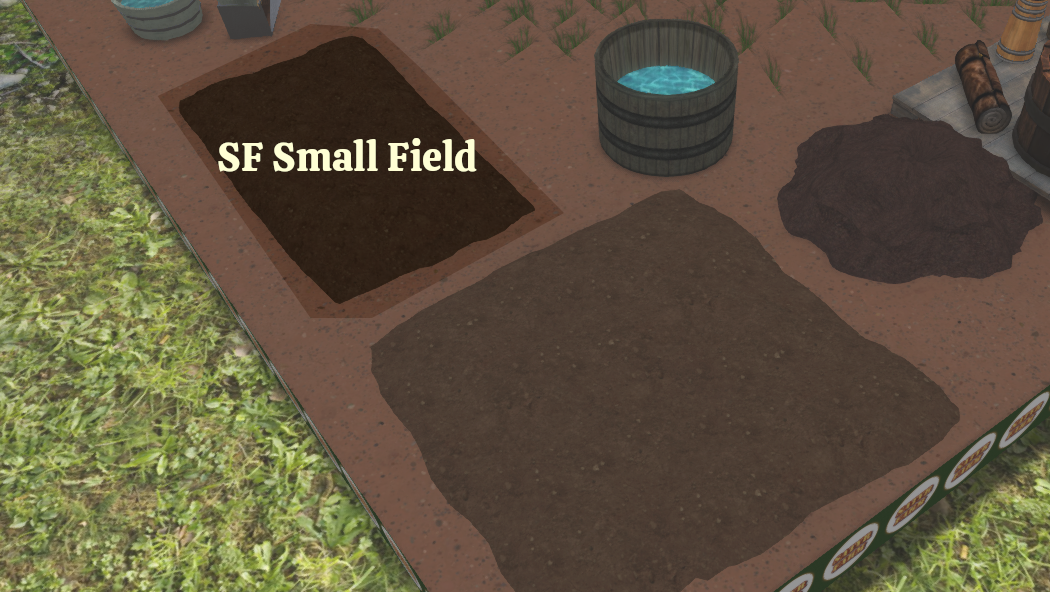
Touch/right click it for the menu. You will notice that there are both the options Water plant and +AutoWater here (similar to the feeders) and you may choose to turn on the auto watering rather than having to do all the watering yourself. The choice is yours (since you can easily turn auto watering on and off you can try both ways and see what suits you).
Touch to get the menu and select Plant and you will see a list of all the plants this field supports. Select Potatoes and you should see them start growing. Plants go through three stages, the first being New. During this stage there isn’t much to do apart from make sure they stay watered. The percentage after new shows how far through this stage the plant is.
Follow the above to plant some Corn in the SF Square field (again there are lots of things you can plant, but corn is the one we will need soon !)
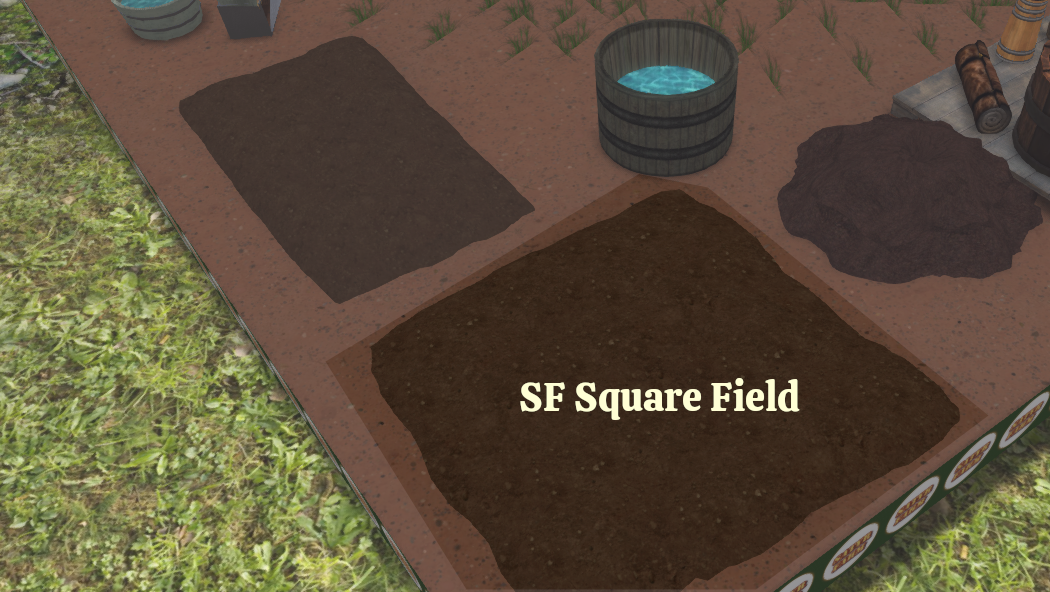
At this point there isn’t much else left for you to do – your animals hopefully are still happy and your potatoes and corn are growing. Now all we need do is to wait...
If you can’t wait you might want to skip to the next chapter and play around with some of the options available for animals!
(b) Nurture & Harvest
As we mentioned above, the first stage plants go through is New. After that they move into Growing. At this stage you can speed things up by adding manure. Manure comes from certain animals when they are adult, plus also from the compost bin. As our animals are still children, they don’t yet give us any manure, however you may notice that you do have a manure pile showing 4% The default setting for this store is to give you ‘portions’ of 2%, so we can take two lots of manure from here if we wish.
If you wish to speed up the growing process, touch the SF Basic Storage and from the menu select Get Product. From that menu select Manure. Then, like we did for the buckets of water from the well, touch the manure sack and it will move towards you and then follow you. Go and stand near the small field then touch it and from the menu select Add Manure. The manure will be added to the plant and you will see the percentage against the Growing stage increase. Depending on how far it was with the growing, it may hit 100%. If it doesn’t you can always add one more lot of manure, but do remember that’s all we have for now. Sometimes patience is most definitely a virtue when it comes to farming!
A short time after the crop gets to Growing 100% it will change to Ripe. Once ripe we can collect our harvest at any time. If we wait to long though and it gets to Ripe 100%, then a short time after that it will perish and we will get a Dead plant, which we don’t really want, so do keep an eye on your crops and harvest them any time during the 0 to 99% range. There is no advantage to harvesting them early or later other than perhaps helping you regulate how you manage and store items. Just make sure you do touch the plant and from the menu select Harvest before they die!
Once you have harvested from a plant, it’s ready for you to plant again. For the small field you can plant some more potatoes or if you fancy a change, plant some tomatoes.
You may notice there is an option for +AutoHarvest and if you select this then plants will automatically harvest themselves and then start growing the same item again.
(c) What to do with harvested items
When you harvest from a field, the crop appears above and you can move it around by touching it and having it follow you. Touch again to put it down.
IMPORTANT: Do not take crops into your inventory as they will become unusable.
Instead if we aren’t going to use the crop right away we can store it.
If you haven’t already, touch the potatoes so they follow you and go stand next to the SF Basic Storage. Then touch the storage unit and from the menu select the Add Product button. It should automatically detect the potatoes and show that as an option. If you don’t see it then you need to make sure the bucket of potatoes is close to the storage unit.
Click on the Potatoes button to have them added. You should see the value for potatoes go up by 2%. Congratulations, your first harvest!
The basic storage (as it’s name suggests) only holds the few items you will need with your basic farm. You may notice Meat and Skin as yes, animals do eventually die, hopefully from old age and nothing else if you treat them well!
As you grow your farm there are additional storage units you can add (in fact there is one platform just for storage items!) but for now the basic storage is all we need.
If you recall, we mentioned we were getting ready to have some pigs on our farm. Pigs eat slop which you can make from, amongst other things, potatoes. So let us have a go at making some!
(d) Making things
As well as rearing animals and growing crops, making things is an essential skill for being a SatyrFarmer! There are a huge number of things you can make but we will start with something basic but essential which is our slop.
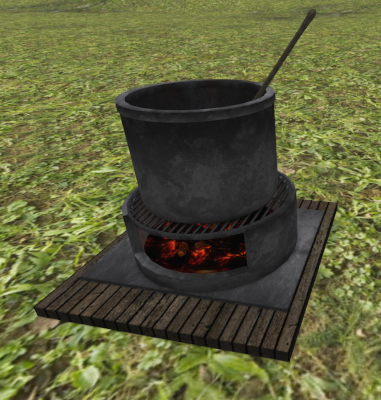
We are going to use the SatyrFarm Kitchen to make our slop.
All ‘machines’ work the same way – we touch them for a menu, select the item we wish to make, then add the required ingredients. For some machines, we then have to sit at the machine to make the item but for others, such as in this case, we can leave it to make it by itself.
Start by touching the SatyrFarm Kitchen to get the menu and then click on the Make… button. This lists all the things that can be made but for now we just click on the Slop button.
You will then get a menu with buttons for all the ingredients that are required. At first glance you may think that it takes a lot of things to make slop! But actually if you look at the floating text above the SatyrFarm Kitchen, you will see that some items are shown together separated by ‘or’.
So for slop, we see we can make it with a bucket of water (which we get from the well) and a bucket of potatoes that we can take back out of the storage unit.
Touch the well to get the water, touch the bucket to bring it to you. Touch the Basic Storage for menu and select Get Product the select Potatoes. Again touch the potatoes to have them move close to you.
Make sure both those items are close to the cooking pot and then add them by clicking on the appropriate button (if the menu isn’t showing, just touch the SatyrFarm Kitchen again to bring up the ingredient buttons).
As we don’t need to do anything else, the slop should start cooking and we can see it’s progress.
When complete we will get our slop rezzed ready for us to either use or to put into storage.
You probably have it figured, but just in case, click the slop to have it follow you and then stand near the Basic Storage, touch the storage and add the product.
Depending on your patience level you can now turn more potatoes (or tomatoes) into slop and then store away, or just take a chance you have enough and move onto getting your pigs!
(e) Pigs
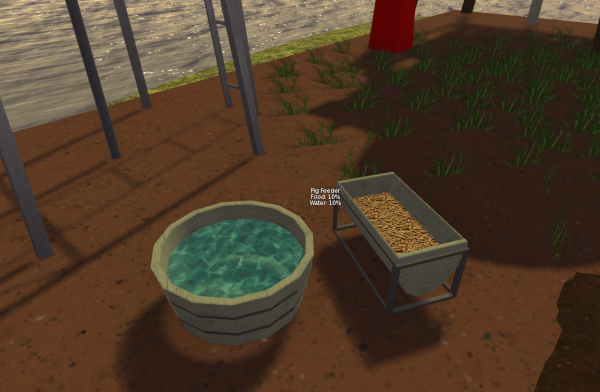
You will find the Pig Feeder near the windmill. Touching it will bring up the menu and you will see that it has options to add water and slop plus options to turn on auto water and auto food. Auto water, as before, takes water from the water tower but what about the auto food option? Well that is configured via a notecard that you can adjust (we will cover that in the next chapter) but for now we will go with it’s default setup which is to take slop from the Basic Storage.
So as long as you have enough slop in store, the pig feeder will automatically top itself up. Note though that unlike the ‘magic’ of water, you need to grow crops, harvest them and then make slop and store it away for the auto food mode to work. Now you see why we started with animals that like grass!
Actually we can reduce our workload even for auto food by using the NPC Farmer – more of that soon!
Okay so lets rez a couple of pigs. Like before, stand close to the pig feeder (or move the animal rezzer box close to it) and select Rez… button then Pigs.
Hurrah – our farm is really taking shape now!
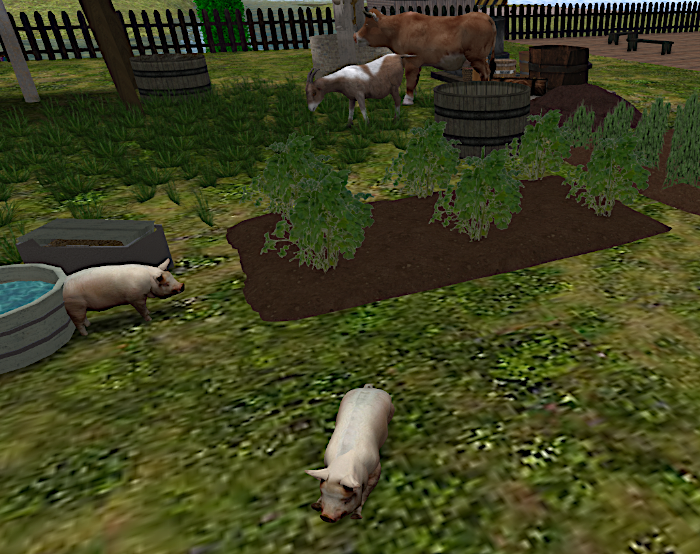
At this point it’s worth mentioning that, just as in real life, expanding your farm is something probably best done gradually.
If you rez to many animals to start with you may not have enough food. If you try and grow to many crops at once, you may run out of water and so on.
That said, if things go horribly wrong, you can always delete and start again – such is the joy of virtual systems!

